So you’ve decided to build your own shed and have piled up the necessary timber. But wait! That wood is untreated. Can you still use as it is or do you need to treat it? Let’s find out.
How To Use & Treat Untreated Wood For A Shed Build (or anything else)
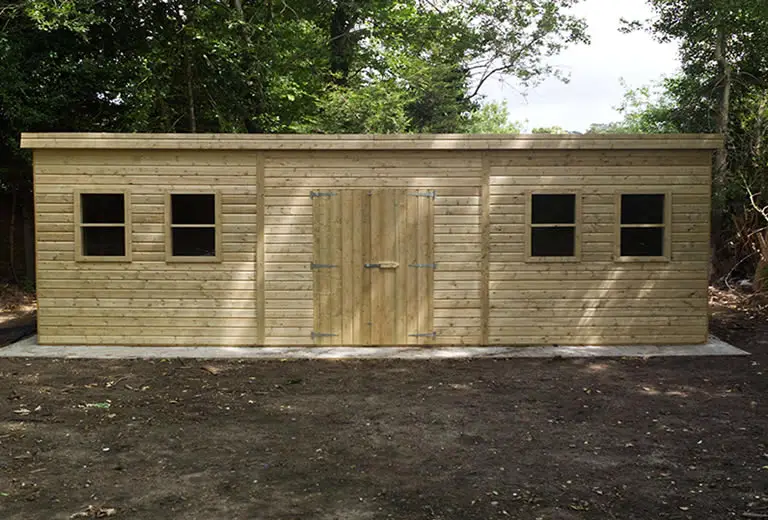
untreated wood in building projects
In this article I explore the possibility of using untreated wood in a shed building project.
I highlight the typical effects you can expect from using untreated wood and outline how you can easily avoid these through a simple process of wood treatment.
Can you use untreated wood for a shed?
Untreated wood looks great and there are a ton of things you can do with it. It is especially good for indoor furniture. But can you use untreated wood for a shed?
You can only use untreated wood for a shed if you treat the wood yourself before or after the shed has been built. The wood needs protected against the effects of the elements, insects and fungal decay.
As you need to treat wood if you plan to use it for a shed I have included detailed instructions for doing that below.
The 3 problems that stem from using untreated wood for a shed build
You’re a very busy lady, and while you’d like to treat your shed, you’re just not sure when you’re going to have the time. If you forego this step and paint directly on the wood, is that really such a big deal?
Yes, it is. Here are several risks you might incur by foregoing the wood treatment process for your shed.
1. Insect invasions
Untreated wood is raw wood, and lots of insects love raw wood. Termites can bore into the wood and leave massive holes in their wake. That will threaten the structural integrity of your DIY shed.
Carpenter ants and carpenter bees can make their homes near raw wood, as may long-horned beetles and powderpost beetles. These beetles are another species of wood-boring insect akin to the termite.
By preserving and priming your shed, these bugs will be far less interested in the wood. Your shed won’t be completely bug-free, but wood-boring insects? Not a risk anymore!
2. Moisture damage
When it rains or snows or the weather is otherwise wet, wood absorbs all that water. Although it might not happen the first time after a storm, eventually, the wood will begin to buckle. It will warp, then it will erode.
This ultimately leads to wood rot, which softens the wood and makes it dangerous to use. Your shed would be good for nothing more than scrap wood at that point if it’s even usable for that purpose.
3. Fungal decay
The warm, dark, moist areas that your wooden shed creates when it’s untreated also make a hotbed for fungi such as mold and mildew. Although mold can be among the least of your problems when your wood structure is rotting, mold is dangerous to breathe in, especially for those with asthma and allergies.
How to treat untreated wood – 4 Simple steps to treating untreated wood
You’re building your very first shed and you’re thrilled. You’ve browsed around online, looking at countless plans, and you finally found the one you liked and promptly downloaded it. Before you get too involved in your planning, you should treat your wooden shed to protect it from the elements. How do you do that?
Here’s how to treat a wooden shed:
- Prep the shed with sandpaper and caulk
- Coat the shed with wood preservative
- Add wood primer
- Paint the shed
Are you not sure what a wood primer is versus a wood preservative? No problem! In this extensive guide, we’ll go over the above steps in more detail. You’ll be ready to treat your shed in no time!
1. Prep the wood
If you’re building your she shed or man cave shed from scratch, then you can skip this first step.
For those ladies who already built their shed and are now only starting to realize that the wood is falling into disarray, you need to restore it as best you can before treating it.
For example, if you have moss, fungi, algae, or even mold growing on the surface of the wood, scrape the stuff away or use a chemical treatment to get rid of it.
You should also look for any openings or gaps, blocking those up with caulk.
If any seals around your shed are in bad shape, such as those around the window, replace them as well. You want the shed to be waterproof so it can withstand long winters and rainy seasons to come; treating the shed will help with this too.
Silicone-based caulk is waterproof, which is just what you need. However, the caulk will require at least a day to dry.
Since you usually can’t apply wood treatments on painted wood, if the planks you have for your shed are painted, that needs to go.
You can strip the wood or use sandpaper to scrape away the paint residue until it’s all gone. Varnish and stain also should be removed before you proceed.
2. Coat the wood with a wood preservative
Next, it’s time to start the shed treatment process. The first product you’ll need is what’s known as a wood preservative. This wood surface treatment includes chemicals that impregnate the wood to prevent decay. Microorganisms, insects, and fungi won’t be able to destroy the wood.
Whether the wood was pressure-treated matters in choosing your wood preservative. Non-pressure treatments are those that you paint directly onto the surface of the wood of your shed. Besides painting, you can also dip the wood into the preservative or spray it on there.
The application of the wood preservative will be easy, but the preservative cannot penetrate as deeply as it can when the wood is pressure-treated.
Pressure-treated wood might not need a treatment for several years, but some homeowners and shed lovers decide to seal theirs anyway. This can prevent sun shrinkage, water seepage, and insect infestations.
The preservatives you use for pressure-treated wood can get deeper into the wood, resulting in a sealed finish that you can trust in for a long time to come.
3. Add wood primer to add a foundational protective layer to the wood
When the wood preservative dries, it’s time to put on wood primer. This is the last step before painting your shed, but it’s a big one.
The duty of wood primer is threefold. The product will further fortify the wooden planks. When you paint over the wood, the paint will adhere better, and your paint will hold up longer without the need to retouch it.
You can put wood primer over stained or painted wood that you want to repaint, but since you can’t do the same with wood preservative, we’ll assume your wood is not stained or painted. That means you should use an oil-based or latex primer.
These primers also come in handy for old wood that really needs the strength boost. Avoid stain-blocking primer, as that’s for pre-stained or painted wood.
If the wood isn’t already clean, then do that before you start the primer application process. You should also sand each piece of wood and clear away all dust residues. Finally, with a paintbrush, layer the primer over the wood. You need at least two layers.
The result of the dual-layered primer might be almost chalky, but this is normal, so don’t panic. Once the primer has time to dry, it will look a lot smoother.
4. Paint the wood with waterproof wood stain (though ordinary paint will do)
Your wooden shed, or the parts that will become your shed, are now officially treated – well almost!
Now comes the fun part, painting!
Since you already primed the wood, once the primer is fully dry, you can crack open that paint can and get to work.
I recommend using an outdoor wood paint or waterproof wood stain though any type of outdoor paint will work fine as it will be water proof and weather-resistant.
If you’re working inside the house or in a garage, lay down some tarp or plastic so that when paint inevitably drips (yes, it will happen no matter how careful you are), it doesn’t stain everything.
You might want to wear gloves or goggles. Consider an apron too to protect your clothing. Alternately, you can wear old clothes that you don’t care about staining.
You can paint each plank with a roller or a paintbrush; it’s your choice. The color is also completely up to you. You might like more muted shades like pastels or neutrals. If you want your shed to be as bright as a rainbow, that’s an option too. There’s no wrong color here!
After painting your entire shed, inside and out, give the paint time to fully dry. You’ll probably have to apply a second layer of paint. In between painting, you might wish to sand the wood planks so they’re as smooth as possible. This will help the second layer of paint dry clump and streak-free.
Conclusion: How To Use Untreated Wood For A Shed Build (or anything else)
Treating a wooden shed protects the shed from the elements, not to mention all those scary wood-boring insects out there. Although it takes some time and a bit of know-how to apply wood preservative and wood primer, you’re a DIY type of gal, so this job is right up your alley!
Now all you have to do is add some man cave décor or she shed essentials and you are set to go.